


Views: 0 Author: Site Editor Publish Time: 2026-09-16 Origin: Site


Staring at a wall of welding equipment can overwhelm anyone. The endless specifications and marketing jargon often blur together, making the selection process incredibly frustrating. Choosing the wrong machine does more than just waste your budget. It ruins critical metalworking projects and causes severe delays on the shop floor. Metal Inert Gas welding, commonly known as MIG, remains the top choice for both weekend hobbyists and seasoned professionals. Its rapid travel speeds, gentle learning curve, and incredible versatility make it an indispensable process in any shop.
This guide cuts through the noise. We will break down the exact technical specifications, hidden features, and underlying technologies you must evaluate before making a final purchasing decision.
Match Power to Purpose: Choose a 110V model for light automotive patching, or step up to a 220V-plus rig for heavy structural steel.
Understand Duty Cycle: A higher duty cycle equates to more continuous arc time without the machine overheating. This stands as the ultimate metric for professional profitability.
Embrace Modern Tech: Inverter-based machines offer lightweight portability and crisp arc control. Traditional transformers provide rugged longevity for dirty environments.
Assess Your Environment: Decide if you need a clean shielded gas setup for indoor precision, or a flux-cored setup to battle wind and rust outdoors.
Future-Proof Your Investment: Always purchase slightly more amperage capacity than your current projects demand to accommodate future skill growth.
Before looking at electrical specifications or digital displays, you must define your daily use cases. The specific materials you weld and your physical environment dictate the baseline requirements for your equipment.
The type of metal you plan to join directly influences the necessary features. Mild steel works smoothly with almost any standard setup. Aluminum wire, however, acts like a wet noodle when pushed through a standard 10-foot gun cable. It tangles easily inside the drive rolls. If aluminum is on your schedule, spool gun compatibility is absolutely non-negotiable.
A standard industry rule states you need roughly one amp of power for every one-thousandth of an inch of metal thickness. Welding eighth-inch steel requires about 125 amps. Keeping this formula in mind prevents the common mistake of buying an underpowered unit.
Your workspace environment dictates the physical footprint of the equipment. Weekend hobbyists typically prioritize portability. They favor rigs that plug into standard garage outlets or fit easily into a truck bed. Because their usage is intermittent, lower duty cycles remain perfectly acceptable.
Professional shop owners operate in a harsh reality. They need a robust metal fabrication welder built to run relentlessly for eight hours a day. These commercial environments demand heavy-duty internal heat sinks, cast-aluminum drive rolls, and the physical capacity to hold massive 33-pound wire spools to minimize production downtime.
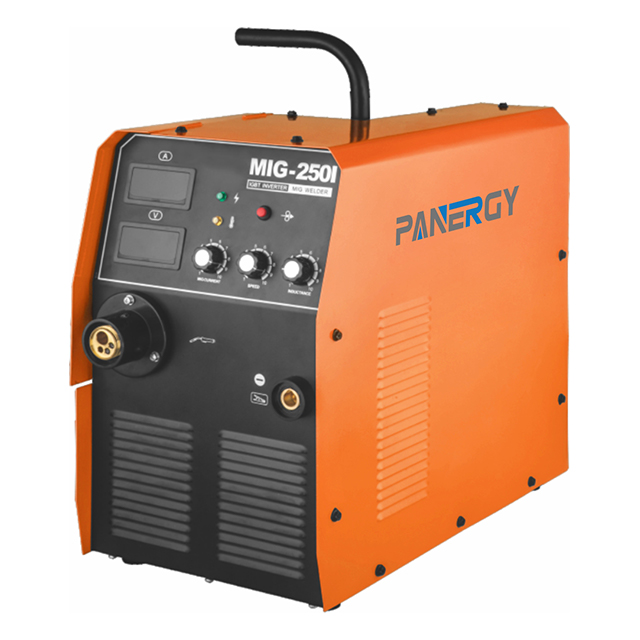
Specifically looking at electrical input, your local grid acts as the ultimate bottleneck. You simply cannot extract more thermal energy from a machine than your wall receptacle supplies.
Machines rated for 110V or 120V operate on standard household electrical receptacles. This makes them highly accessible for residential garages and mobile repair carts. They excel at thin sheet metal work and automotive exhaust patching. However, their lower voltage ceiling severely limits maximum amperage output. This makes them entirely unsuitable for heavy load-bearing structures.
When transitioning to thicker materials quarter-inch and above, a 220V or 240V power supply becomes mandatory. The elevated voltage allows the system to generate the intense heat required for deep root penetration. Without adequate penetration, welds on thick plates might look beautiful on the surface but will inherently lack structural integrity. Installing a dedicated 220V circuit incurs an upfront cost, yet it remains a required investment for serious metalworking.
Marketing brochures love to print peak amperage figures in massive fonts. Peak power only tells a fraction of the story. Duty cycle stands as the unvarnished test of a machine's survival and long-term capability.
Amperage dictates the volume of heat the arc produces. Breaking down common amperage tiers helps align the equipment with your realistic project scope. A 140-amp machine works well for auto body panels. A 180-amp machine offers a fantastic middle ground for medium brackets. Meanwhile, 250-amp to 500-amp machines are engineered for heavy structural steel and continuous manufacturing.
Expressed as a percentage, the duty cycle represents how many minutes out of a standard 10-minute period a machine can weld continuously before thermal overload protection kicks in. A 30 percent duty cycle at 150 amps means you can lay a continuous bead for three minutes, followed by seven minutes of mandatory cooling time.
If you are fabricating a long utility trailer, a low duty cycle will constantly interrupt your workflow. Commercial operators must prioritize equipment with a high duty cycle to maintain profitability and prevent premature motherboard burnout.
To illustrate the massive gap between hobbyist gear and industrial equipment, look at the specifications of a standard prosumer unit versus a heavy-duty manufacturing rig.
Specification | Standard Prosumer Model | Panergy 500A Inverter Dual MIG |
|---|---|---|
Amperage Range | 30A - 200A | 50A - 500A |
Duty Cycle | 30% at 200A | 60% at 500A / 100% at 387A |
Input Voltage | 220V Single Phase | 380V Three Phase |
Drive Roll System | Lightweight Plastic / Dual Roll | Heavy-Duty Cast Aluminum / Four Roll |
Ideal Application | Light structural, automotive repair | Heavy manufacturing, shipbuilding, steel framing |
Recent market analyses reveal a definitive shift in the metal fabrication sector. The industry is rapidly moving away from power-hungry, manual setups toward smart, digitally controlled equipment. Energy efficiency regulations and a demand for high-precision manufacturing drive this rapid change. Modern fabrication shops now favor setups equipped with advanced microprocessors. These smart systems offer synergic tuning, precise pulse capabilities, and real-time arc monitoring. This evolution reduces spatter, minimizes post-weld cleanup, and significantly lowers overall power consumption across the shop floor.
Understanding the internal architecture of your equipment is crucial for long-term reliability. The debate between new digital tech and old-school copper coils continues in many fabrication shops.
A modern inverter MIG welder utilizes solid-state electronic components, such as insulated-gate bipolar transistors, to convert and regulate wall power. The most immediate benefit is a drastic reduction in physical mass. An inverter unit weighs a fraction of a comparable transformer model. Beyond portability, they are exceptionally energy-efficient. Because microprocessors control the arc dynamics, these machines provide a buttery-smooth, stable arc and allow for advanced features like automatic voltage tuning.
In contrast, traditional transformer machines still hold their ground in highly abrasive environments. Relying on massive copper coils to step down voltage, they are exceptionally heavy and cumbersome. This simplicity, however, makes them incredibly rugged. Containing fewer sensitive electronic circuit boards, they are far less susceptible to failure from conductive metallic dust and high humidity.
All MIG setups utilize a motorized mechanism to push a consumable wire through a gun. Yet, the method deployed to protect that molten puddle from atmospheric oxygen varies wildly based on your chosen setup.
Traditional setups use a solid copper-coated steel wire paired with an external cylinder of compressed shielding gas, usually a 75 percent Argon and 25 percent CO2 mix. This method produces pristine, aesthetically pleasing welds with virtually zero slag to chip away afterward. It is the absolute standard for indoor fabrication and precision furniture. Unfortunately, even a slight breeze will blow the gas shield away, rendering it useless outdoors.
Furthermore, when the environment turns hostile, a gasless MIG welder becomes your best asset. This process utilizes a hollow tubular wire packed with chemical flux compounds. As the intense heat melts the wire, the flux burns to create its own localized gas shield and a protective layer of slag over the cooling weld. This makes it perfect for windy outdoor conditions and repairing rusty farm implements where pristine metal preparation is impossible.
Beyond raw electrical output, specific mechanical features separate premium, reliable machines from frustrating knock-offs. When evaluating your options, pay close attention to the mechanical delivery systems.
The drive assembly serves as the beating heart of any wire feed system. Budget machines notorious for cutting corners often use single-drive, flimsy plastic rollers that flex under tension. This leads to erratic wire feeding and bird-nesting inside the cabinet. Professional-grade rigs utilize cast aluminum drive assemblies with dual or four-roll geared mechanisms. This ensures smooth, uninterrupted wire delivery regardless of cable angle.
Modern equipment increasingly features synergic programming. Instead of relying on a confusing chart taped to the inside door, the operator simply inputs the metal thickness and wire diameter into an LCD screen. The machine automatically calculates the optimal voltage and wire feed speed. This practically eliminates the trial-and-error phase for beginners and speeds up setup times for seasoned veterans.
Data gathered from professional fabricators highlights several common regrets buyers experience shortly after unboxing their new tools. Sidestepping these pitfalls will save you from needing a replacement unit a year down the road.
The most widespread error is adopting a short-sighted purchasing mentality. A hobbyist might only need to patch thin exhaust pipe today and opt for a baseline 140-amp unit. Six months later, they decide to build an off-road bumper and realize their machine lacks the necessary thermal punch. Always step up one size from your current baseline. This extra headroom ensures you do not outgrow your tools.
The internet is flooded with obscure brands offering unbelievable specifications for pennies. While tempting, these machines often rely on proprietary consumables. When a contact tip inevitably fuses to the wire on a Sunday afternoon, you will not find replacement parts at your local hardware store. Always verify that the machine utilizes industry-standard consumables.
The price tag printed on the machine itself rarely reflects the final cost of your metalworking setup. Accurately budgeting for the entire ecosystem is crucial to avoid financial shock.
The market generally segments into three distinct pricing tiers. Budget models serve as accessible entry points but often lack durability. Mid-tier prosumer models strike a better balance, featuring advanced inverters and cast-aluminum drives. At the top end, an industrial welding machine is a heavy-duty capital investment. These are designed to survive relentless daily abuse, offering unmatched precision and zero downtime.
Remember that a bare machine cannot join metal straight out of the box unless you are running flux-cored wire. You must account for the hidden costs of fabrication. This includes purchasing an Argon and CO2 gas cylinder, acquiring a rapid-response auto-darkening helmet, heavy leather safety gear, and a dedicated angle grinder for essential metal preparation.
Navigating the equipment market does not have to be an overwhelming ordeal. The absolute best equipment is the one that perfectly aligns with your available power supply, your typical material thickness, and your workspace environment. By prioritizing a high duty cycle, robust drive mechanics, and locally accessible consumables, you guarantee a smooth fabrication experience.
Take the time to assess your long-term goals. Pad your amperage requirements slightly for future growth, and invest in a reliable wire feed welder that will serve as the cornerstone of your shop for years to come. For industrial-grade solutions tailored to heavy manufacturing, explore the advanced lineup at Panergy Machinery to find the exact setup your production floor demands.
While often used interchangeably in casual shop talk, a technical distinction exists. All MIG machines fall under the broader category of wire feed welders, but not all wire feed welders are true MIG machines. MIG stands for Metal Inert Gas, meaning it specifically requires an external cylinder of compressed gas to shield the puddle. Some wire feed units are exclusively designed to run gasless flux-cored wire and lack the internal solenoids required for gas hookups.
Generally speaking, no. The laws of physics and electrical resistance restrict what a standard household outlet can output. A 110V machine typically maxes out around 130 to 140 amps. Since quarter-inch steel ideally requires around 250 amps for deep, single-pass penetration, a 110V unit will likely result in a cold, weak weld that sits on the surface. For thick structural steel, a 220V power source is highly recommended to ensure structural safety.
Absolutely. Inverter systems are highly recommended for novices. Their internal microprocessors dynamically manage the arc characteristics, resulting in a much smoother, more forgiving arc that produces significantly less spatter. Many feature synergic controls that automatically dial in complex voltage and wire speed settings. This allows beginners to focus entirely on gun angle and travel speed.
For most general mild steel fabrication, 0.030-inch or 0.035-inch solid wire is the industry standard. The 0.030-inch wire provides excellent control for thinner sheet metal and exhaust tubing, while 0.035-inch wire handles quarter-inch plate and heavy brackets efficiently. If you are welding very thin auto body panels, dropping down to 0.023-inch wire helps prevent burn-through.
A true professional-grade machine designed for a fabrication shop typically starts around $1,500 and can easily exceed $4,000 for high-amperage, three-phase industrial models. When budgeting, remember to add roughly $300 to $500 for a high-quality auto-darkening helmet, heavy-duty gloves, a gas cylinder, and initial consumable supplies.
